-2-(3).png)
How to Share the Photo Upload Link with Guests
This guide explains how to make the photo upload page available and allow guests to upload their photos during your event.
Step 1 — Open the Event
Go to Events in the left sidebar.
Click on the event you want to share with your guests.

Step 2 — Set the Event Status to “In Progress”
To allow guests to upload photos, the event must be active.
In the top-right corner of the event page, open the Status dropdown.
Change the status to In Progress.

What happens if the event is not active?
If the event status is Not Started, guests will see this message on the upload page:
“Event has not started. Please check back later.”
They will not be able to upload photos.

Step 3 — Share the Upload Page with Guests
Once the event is In Progress, the upload page becomes available.
On the event page, you can share it in several ways:
Option 1 — Copy the Upload Link
- Click URL
- Copy the link
-
Share it with guests via message, email, or social media
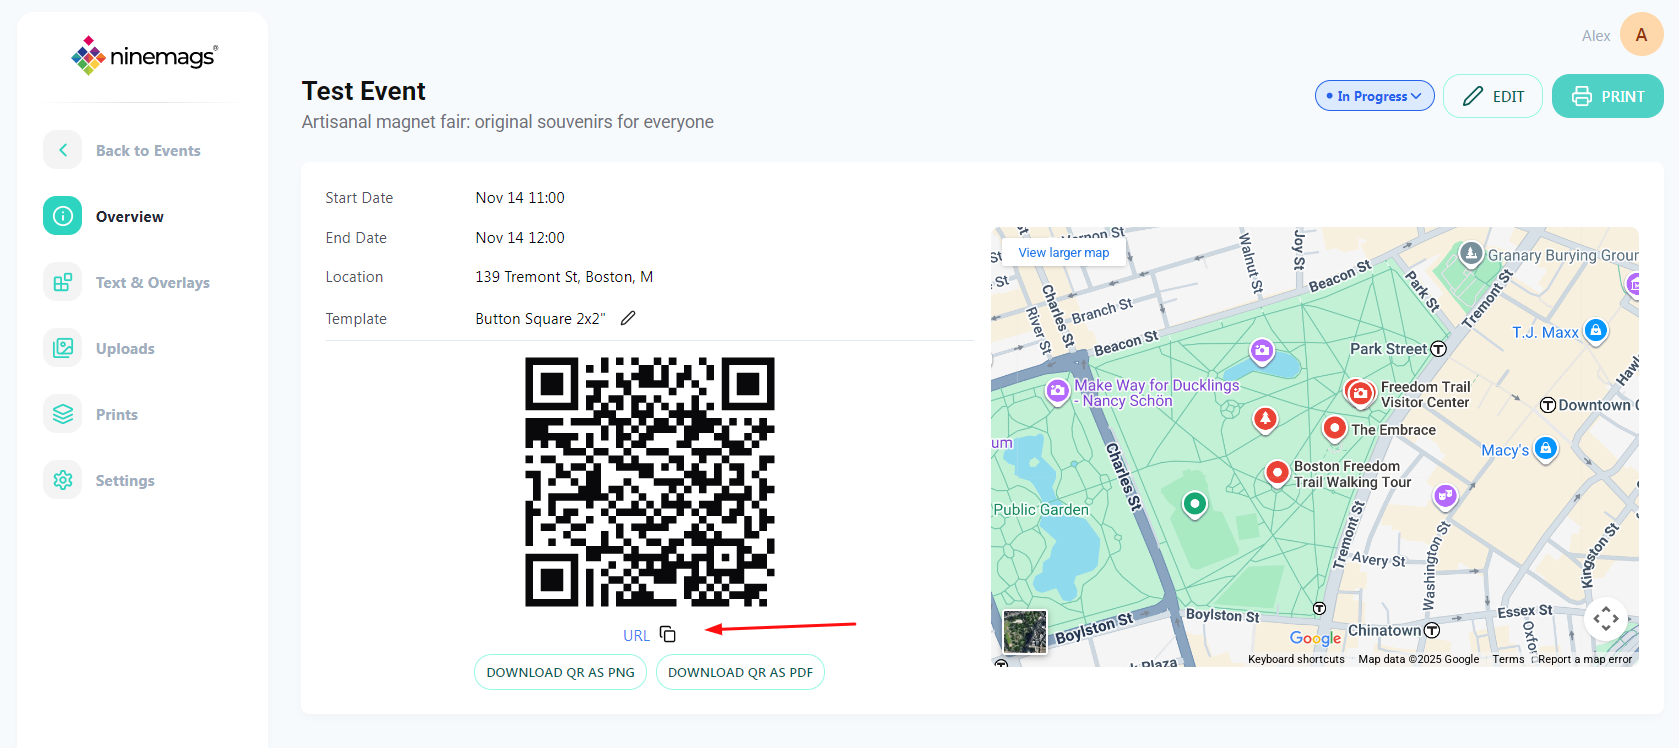

Option 2 — Share a QR Code
You can also use the event QR code so guests can scan it with their phone.
Available options:
- Download QR as PNG — for screens, phones, or social media
- Download QR as PDF — for printing and physical posters
Guests can scan the QR code and upload photos instantly.

Done
Your event is now open for guest photo uploads.
Guests can upload photos as long as the event status remains In Progress.