-2-(3).png)
Product Sizes & Variants in NINEMAGS
How they work, how to add new sizes, and what to avoid
In this guide, you’ll learn:
- how product variants work in Shopify
- how to correctly add new sizes
- what limitations exist when using variants with NINEMAGS
How product variants work
In Shopify, variants are different versions of the same product
(for example: 1.5x1.5, 2x2, 3x3).
Each variant:
- is selected by the customer on the product page
- has its own settings in NINEMAGS
- defines how many images the customer must upload
Important
NINEMAGS works on the variant level, not on the product as a whole.
How to add new sizes (variants)
Step 1. Add a variant in Shopify
-
Go to Products
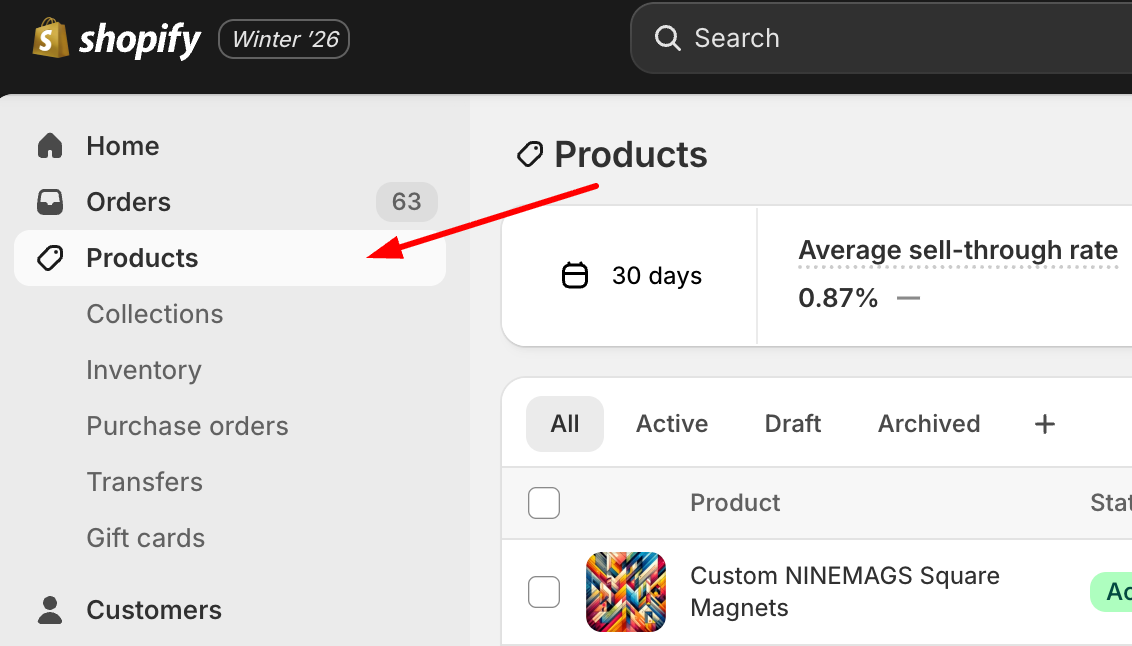
- Open the product you want to edit
-
In the Variants section, click on the existing variants
(for example: NINEMAGS Magnets or size labels like 1.5x1.5, 2x2, 3x3)


-
In the Option values field, add a new size
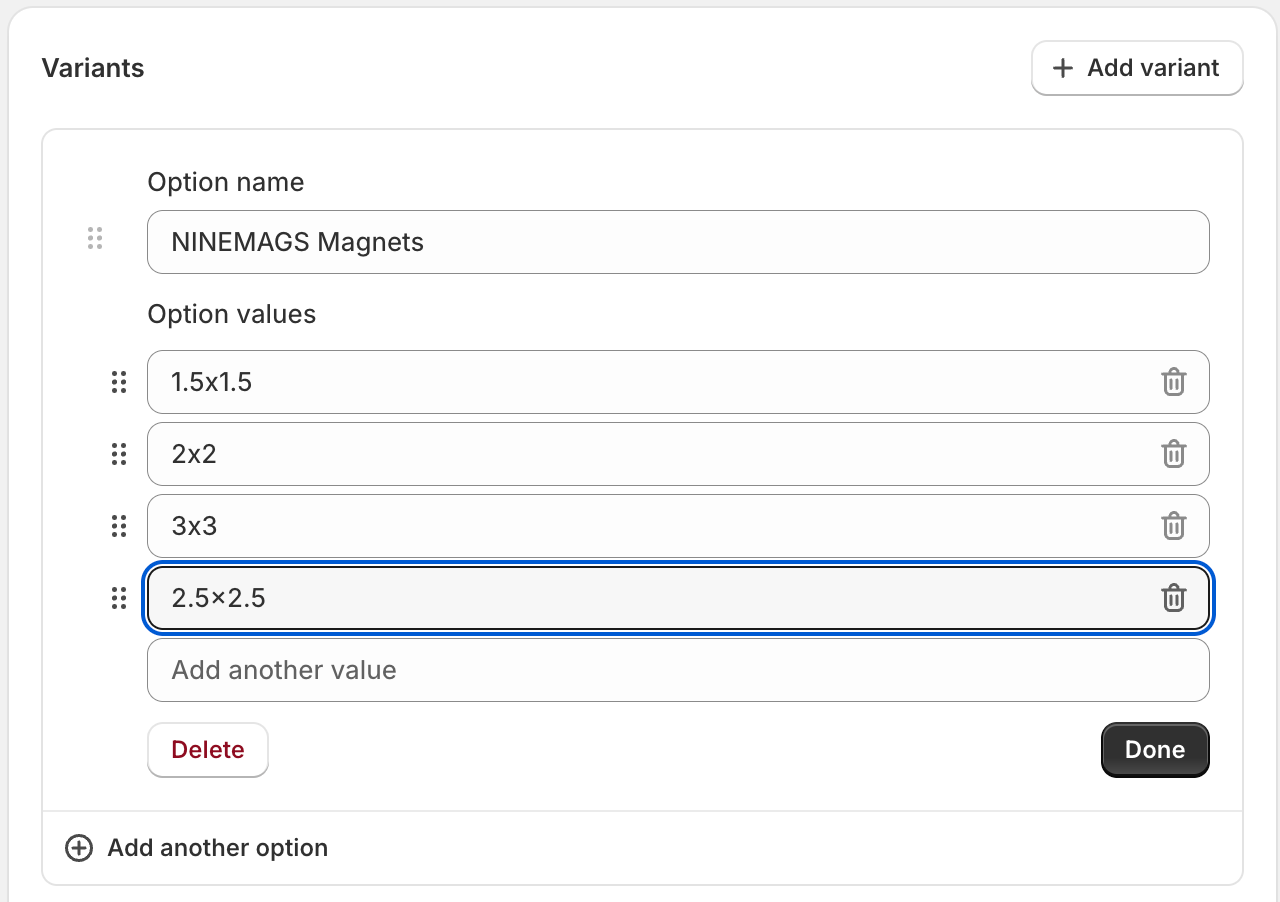
- Click Done
- Save the product

Why we do it this way
We do not click “Add another option”, because:
- sizes should be values of one option, not a new option
- “Add another option” creates a second option (for example, Color)
Step 2. Set price and inventory
- In the Variants block, set:
- price
- inventory quantity

Step 2. Configure the variant in NINEMAGS (required)
After adding a new size in Shopify:
-
Go to Apps → NINEMAGS → Products

- Click Select Product
- Find the product in the list
-
Select the needed variant
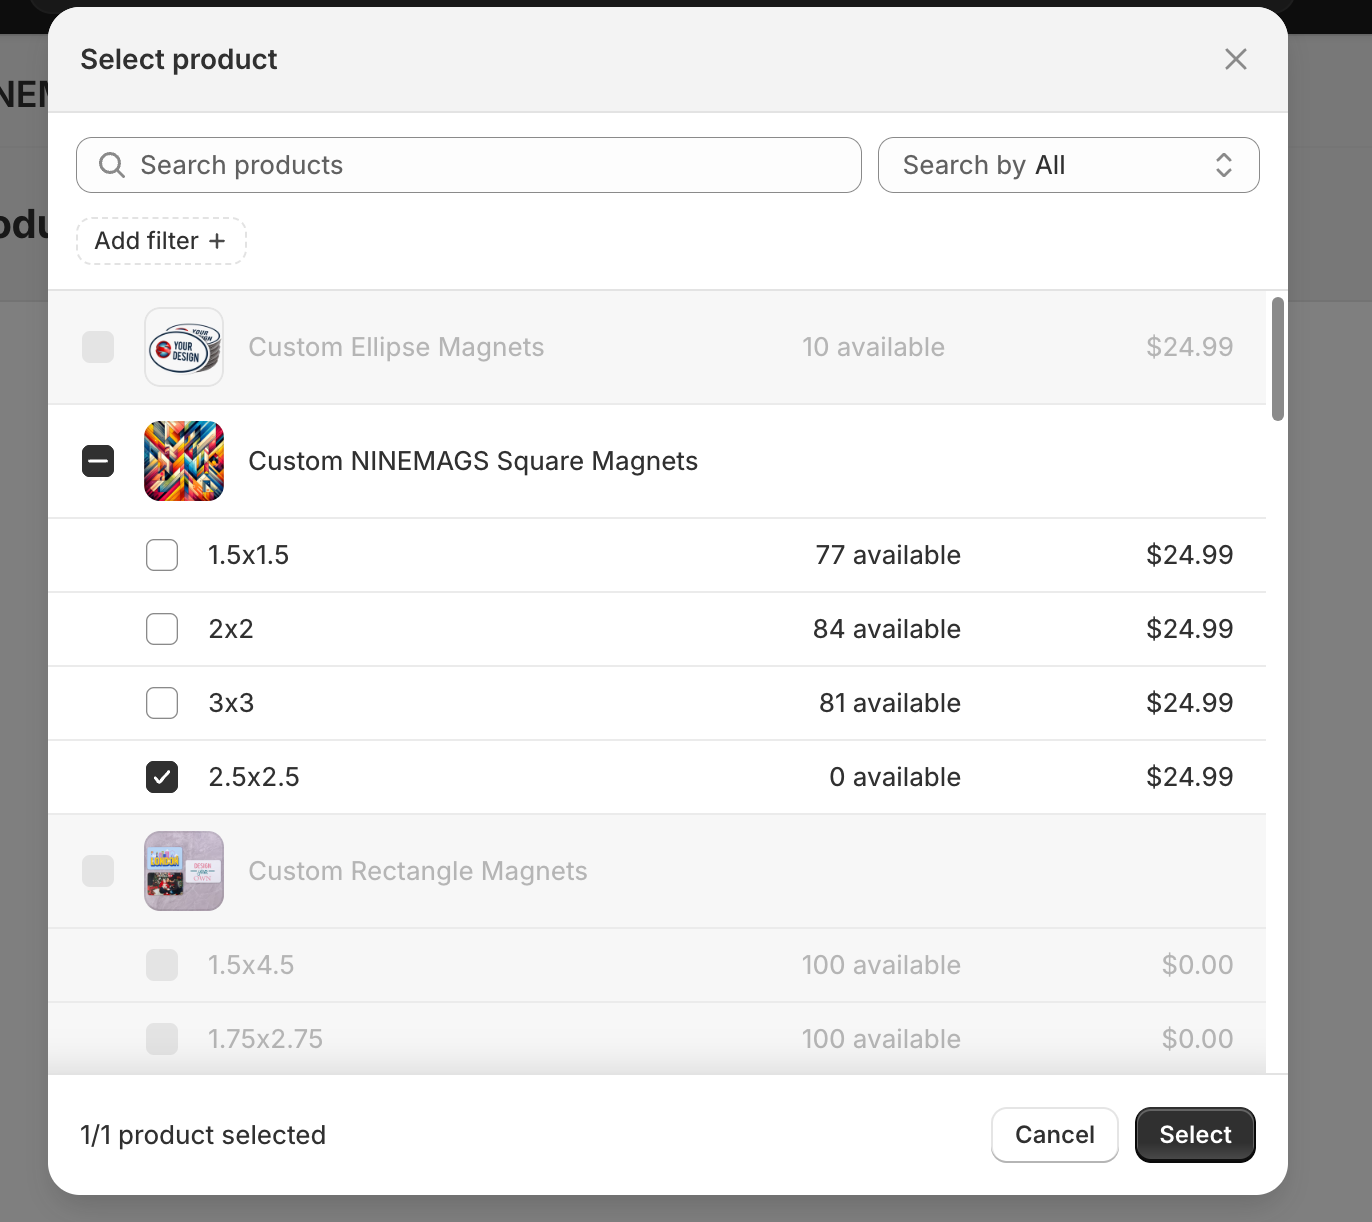
- Click Select
-
Check the required size and click Edit


Step 3. Edit variant properties
In the Edit properties window, fill in the required fields:
Required fields
- Type: Button
- Paper Size: Letter
-
Button Shape & Size:
must match the variant size
(for example: Square 2.5x2.5")
-
Upload amount:
number of images the customer must upload
Example: Upload amount = 4
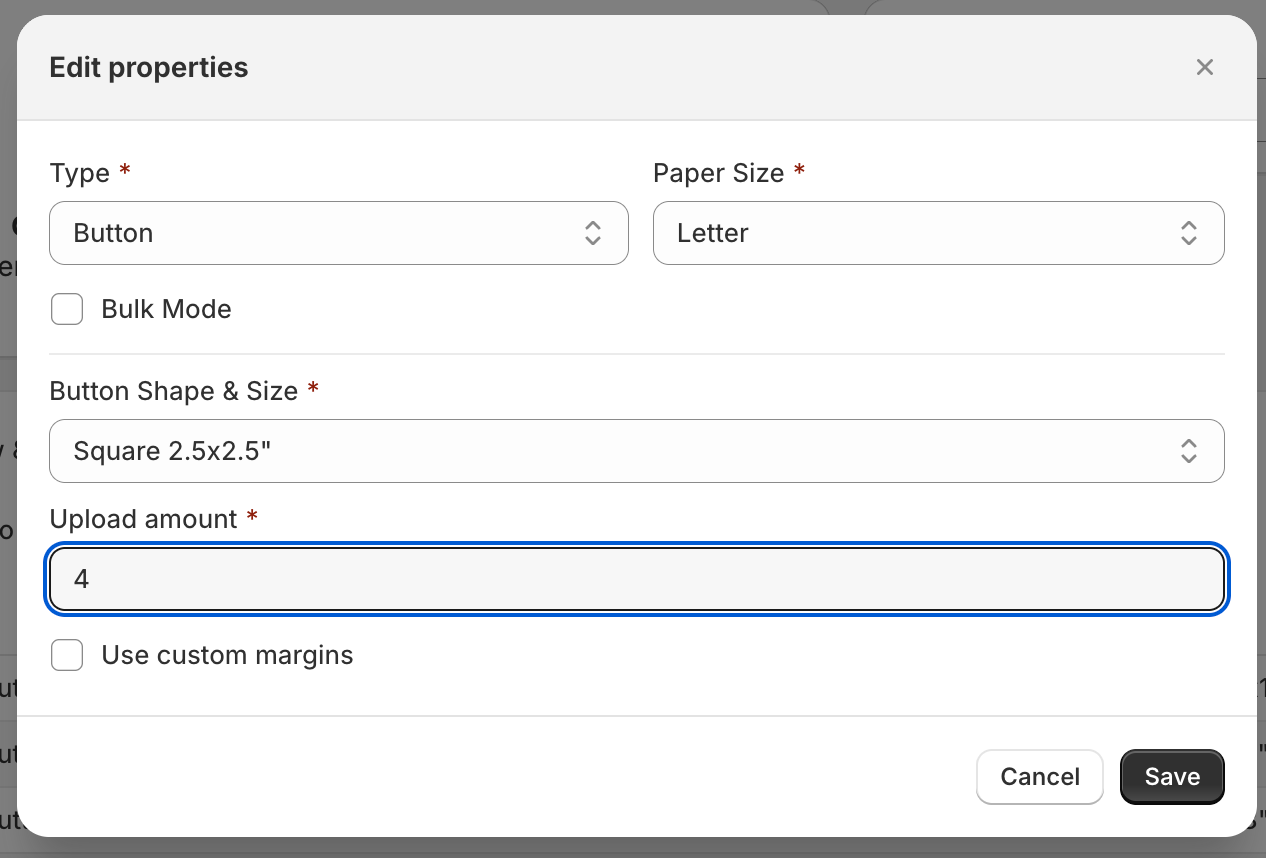

- Click Save in the edit window

-
Then click Save in the top-right corner of the page
(Shopify will show “Unsaved changes”)
Step 3. Check on the storefront
On the product page:
- select the new size
- click Upload pictures
- make sure the number of upload slots matches your settings

⚠️ Limitations when working with variants
❌ You cannot add a variant only in Shopify
If a variant is:
- added in Shopify
- but not configured in NINEMAGS
➡️ the upload button may work incorrectly
➡️ the number of images may be wrong
➡️ order processing errors may occur
❌ Do not rename existing sizes without testing
Example:
2x2→2 x 2 inch
Why this is risky:
- NINEMAGS may lose the connection to the variant
- image upload may no longer match the correct size
❌ Avoid frequent changes to variant structure
Risky actions:
- changing the option name
- merging sizes
- deleting active variants
📌 If the variant structure changes, you must recheck all NINEMAGS settings.
Recommended workflow
If you need to add or change a size:
- Add or edit the variant in Shopify
- Configure this variant in NINEMAGS
- Check Upload amount
- Test on the storefront
Quick summary (most important)
- Each size = a separate variant
- Each variant = a separate NINEMAGS configuration
- Every new size requires setting Upload amount
- Variant changes without testing are the #1 cause of errors