-2-(3).png)
Adding a New Product with NINEMAGS
This guide explains how to create a product in Shopify and correctly connect it to NINEMAGS so customers can upload images and place custom orders.
Step 1. Create a Product in Shopify
At this stage, you create a regular Shopify product that will later be connected to NINEMAGS.
1. Open the product editor
- Go to Shopify Admin
- Open Products

- Click Add product (top right corner)

2. Fill in the main product information

Product title
Enter a clear product name.
Example:
Custom NINEMAGS Square Magnets
Product description
Add a product description that will be shown on the product page.
Recommended structure:
- Short introduction
- Key benefits
- What this product is best for
Media
Upload at least one product image.
This image is used only for display — customers will upload their own images later.
Step 2. Add Product Variants (if needed)
If your product has sizes or other options (for example: 1.5×1.5, 2×2, 3×3), you must add variants.

How to add variants
- Scroll to the Variants section
- Click Add options like size or color
- Enter variant values (sizes)

Variant check
After saving:
Each size becomes a separate variant
Each variant has:
- Price
- Inventory (availability)

Step 3. Connect the Product to NINEMAGS
To enable image uploads, the product must use a NINEMAGS Shopify template.
1. Open the NINEMAGS app
- Shopify Admin → Apps → NINEMAGS
- Go to Products

2. Select the product
- Click Select Product
- Find your product in the list
- Select the product and all required variants
- Click Select

Recommendation:
Select all variants that use the same customization logic.
3. Assign the Shopify product template

On the Manage Product Settings page:
- Find the Product Template field
- By default, Default product is selected
-
Choose the NINEMAGS template you created earlier
(for example:
ninemags_template)

After this:
- The product starts using the NINEMAGS template
- The Upload pictures button appears on the product page
4. Configure the Product Inside NINEMAGS
This step is required to:
- Connect the Shopify product to NINEMAGS
- Configure variants (sizes)
- Set how many images the customer must upload
- Enable correct upload behavior
1. Select the product
-
Click Select Product

- Find and select your product
- Click Select


2. Configure a variant
Each variant must be configured separately.
- Select one variant (for example:
2x2) -
Click Edit
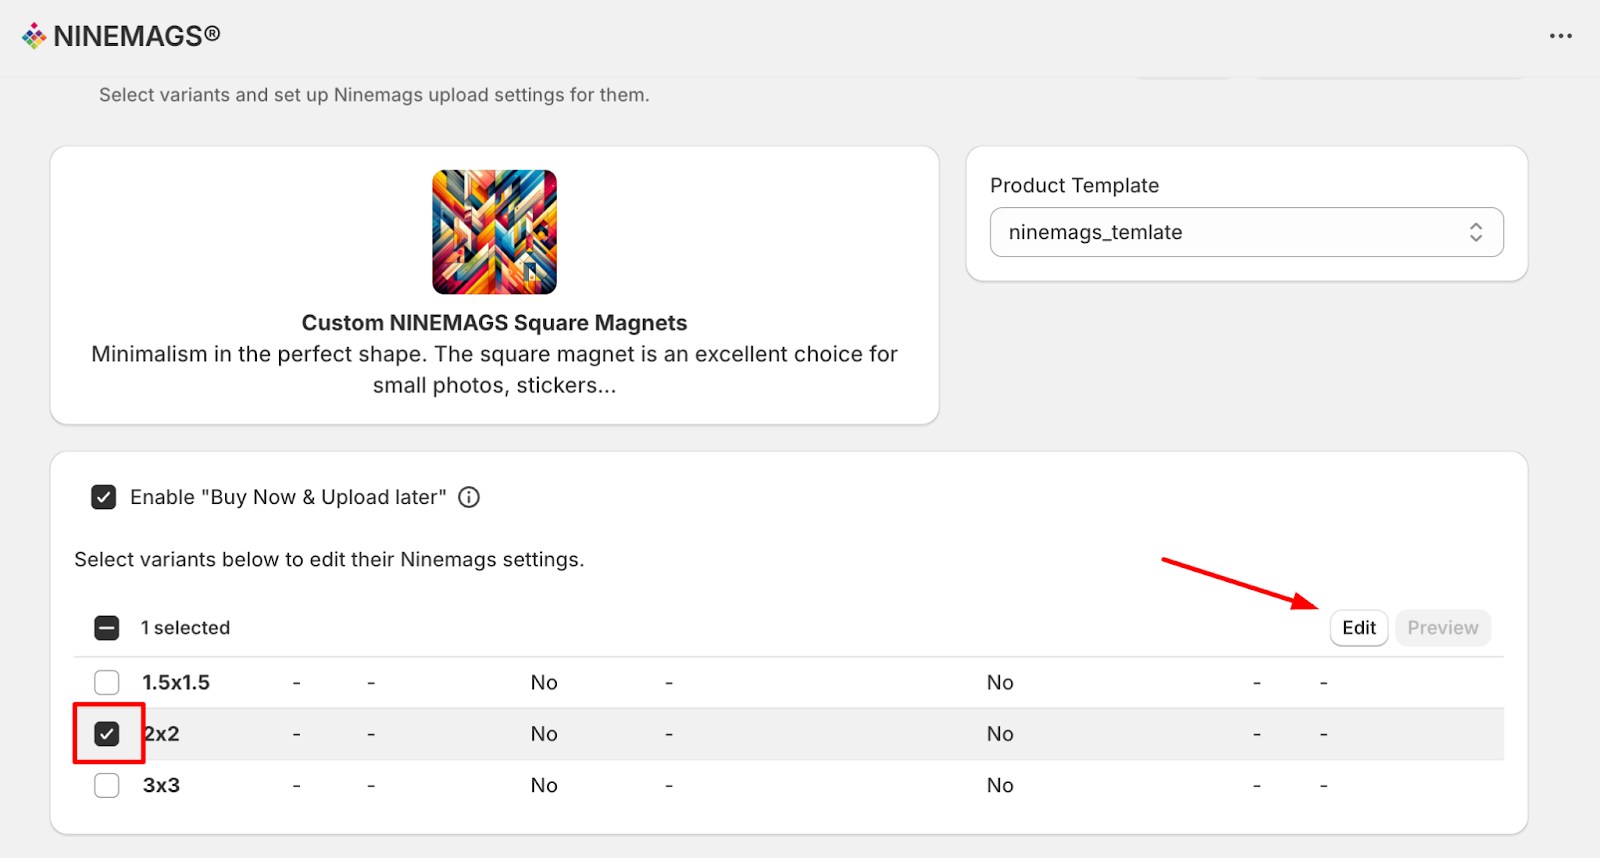

In the Edit properties window, fill in the required fields:
Required fields
- Type: Button
- Paper Size: Letter
-
Button Shape & Size: Must match the variant size
(example: Square 2×2″)
-
Upload amount:
Number of images the customer must upload
Example:
Upload amount = 9

- Click Save in the modal window
- Click Save again in the top-right corner of the page

5. Check the Result
After saving, the configured variant should display:
- Type
- Paper format
- Size
- Upload amount
Example:
- Variant: 2×2
- Upload amount: 9
If these fields are filled — the variant is configured correctly.

Important
Each product variant (for example: 2×2, 3×3, etc.) must be configured separately in NINEMAGS.
If a variant is not configured:
- the customer will not be able to upload images
- the order will not be processed correctly
After changing any settings, always click the Save button at the top of the page.
How to Know the Product Is Connected Correctly
A product is connected properly if both conditions below are met.
1. Upload button appears on the product page
On the storefront:
- the NINEMAGS / Upload pictures button is visible
- the button is clickable
- clicking it opens the image upload window

❌ If there is no button — the product is not connected to NINEMAGS.
If the NINEMAGS / Upload pictures button is not visible on the product page, it means that the NINEMAGS template is not configured or not assigned correctly.
This usually happens for one of the following reasons:
- The Templates setup step was skipped
- A wrong Shopify product template is selected
- The product is still using the default Shopify template instead of a NINEMAGS template
👉 Please go back and check:
- that a NINEMAGS template exists
- that this template is assigned to the product in Product Template settings
Once the correct template is selected and saved, the upload button will appear on the product page.
2. Upload slots change based on variant
When switching product variants (for example: 1.5×1.5, 2×2, 3×3):

- the number of upload slots changes
- the number matches the Upload amount set for each variant

Example:
- 1.5×1.5 → 1 image

- 2×2 → 2 images

- 3×3 → 3 images

❌ If the number of images is the same for all variants — the variant is configured incorrectly or not linked to NINEMAGS.
Summary
If:
✅ the upload button is visible
✅ the number of images changes correctly per variant
The product is connected and working correctly.